Managing Persistent Volumes in Your Deployment

Passionate fresher seeking to build a career in Devops. Committed to learning and developing new skills to contribute to innovative solutions that drive success.
Think of a Persistent Volume as a piece of storage that is separate from your application containers. It's like a virtual hard drive that you can use to store data that needs to persist beyond the life of your containers.
A Persistent Volume is created by an administrator and can be backed by different types of storage such as a network file system, a block device, or a cloud storage service. Once the PV is created, it can be used by any container that has the necessary permissions.
To use a Persistent Volume in your application, you first need to create a Persistent Volume Claim (PVC). A PVC is a request for a specific amount of storage that is backed by a PV. When you create a PVC, Kubernetes will find a matching PV and bind it to the PVC.
Once the PVC is bound to a PV, you can use it as a volume in your application containers. You can mount the PV as a file system, a block device, or a raw device inside your containers.
The advantage of using Persistent Volumes is that it provides a way to separate your data from your application containers. This allows you to store and manage your data independently of your containers, which makes it easier to scale your applications and manage your storage resources.
Task 1:
Add a Persistent Volume to your Deployment todo app.
Create a Persistent Volume using a file on your node.
Create a Persistent Volume Claim that references the Persistent Volume.
Update your deployment.yml file to include the Persistent Volume Claim.
Apply the updated deployment using the command:
kubectl apply -f deployment.ymlVerify that the Persistent Volume has been added to your Deployment by checking the status of the Pods and Persistent Volumes in your cluster. Use this commands
kubectl get pods,kubectl get pv
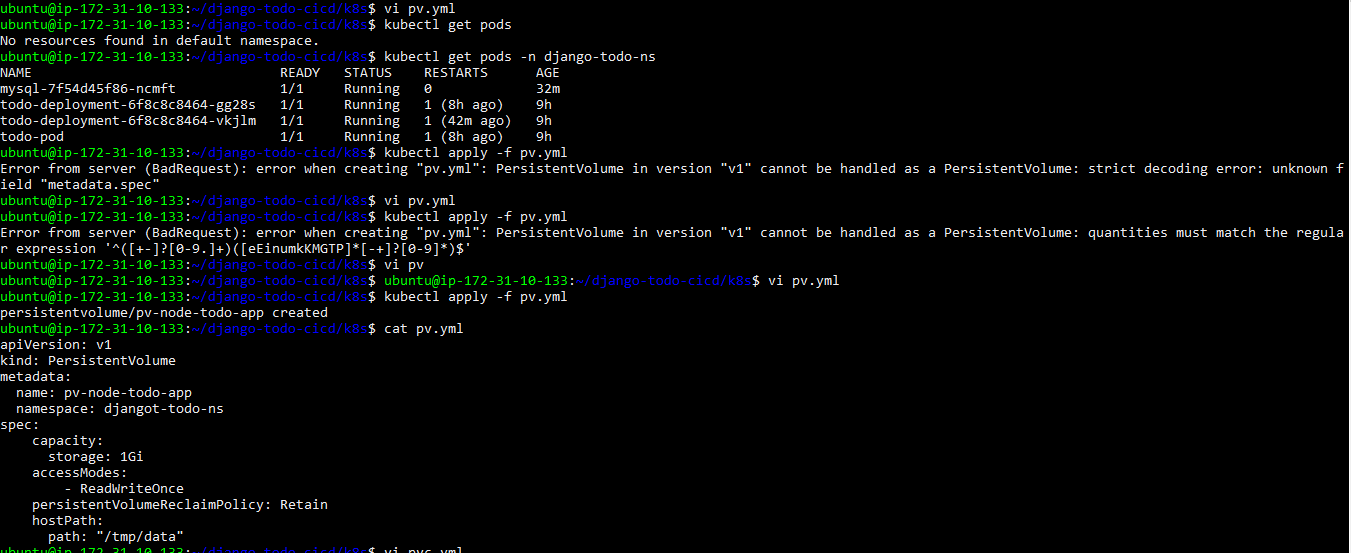
creating persistent volume

creating persistent volume claim


Modifying deployment.yml file

apiVersion: apps/v1
kind: Deployment
metadata:
  name: todo-deployment
  namespace: django-todo-ns
  labels:
    app: todo-app
spec:
  replicas: 2
  selector:
    matchLabels:
      app: todo-app
  template:
    metadata:
      labels:
        app: todo-app
    spec:
      containers:
      - name: todo-app
        image: shubhamdhyani/django-todo-cicd
        ports:
          - containerPort: 8000
        volumeMounts:
          - name: todo-app-data
            mountPath: /app
      volumes:
        - name: todo-app-data
          persistentVolumeClaim:
            claimName: pvc-todo-app
THAT'S ALL FOR TODAY'S LEARNING I HOPE YOU LEARN SOMETHING FROM THIS BLOG


