Working with Namespaces and Services in Kubernetes

Passionate fresher seeking to build a career in Devops. Committed to learning and developing new skills to contribute to innovative solutions that drive success.
What are Namespaces and Services in k8s
In Kubernetes, Namespaces and Services are two distinct but important concepts that are used to organize and manage resources in a cluster.
A Namespace is a virtual cluster inside a Kubernetes cluster, which provides a way to partition the cluster resources into multiple, isolated groups. Each Namespace can have its own set of resources, such as Pods, Deployments, Services, ConfigMaps, Secrets, and more. Namespaces provide a way to organize and manage resources in a more efficient and scalable way, especially in large or complex clusters.
On the other hand, a Service is an abstract way to expose an application running on a set of Pods as a network service. A Service provides a stable IP address and DNS name that can be used to access the Pods, even if the Pods are replaced or rescheduled due to scaling, rolling updates, or failures. Services can be either internal or external, depending on whether they are accessible only within the cluster or also from outside the cluster.
Load Balancing, and Networking in Kubernetes
- Load Balancing:
In Kubernetes, Load Balancing is a mechanism that distributes incoming network traffic across multiple instances of a Service. This helps to improve the performance, scalability, and availability of the application by distributing the workload evenly and avoiding overload on any single instance. Kubernetes provides different types of Load Balancers, such as the built-in Service Load Balancer, the Ingress Controller, and external Load Balancers provided by cloud providers.
- Networking:
Networking in Kubernetes refers to the way that Pods and Services communicate with each other within a cluster. Kubernetes provides a flat network model, where each Pod has a unique IP address and can communicate directly with any other Pod or Service in the same cluster, regardless of which node they are running on. This is achieved through the use of a container network interface (CNI) plugin, which creates a virtual network that connects all the Pods and Services in a cluster.
Task :
Create a Namespace for your Deployment
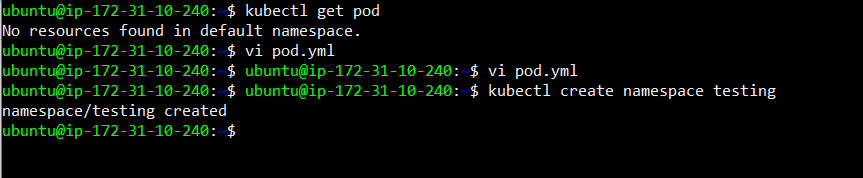
Use the command
kubectl create namespace <namespace-name>to create a NamespaceUpdate the deployment.yml file to include the Namespace
Apply the updated deployment using the command:
kubectl apply -f deployment.yml -n <namespace-name>Verify that the Namespace has been created by checking the status of the Namespaces in your cluster.
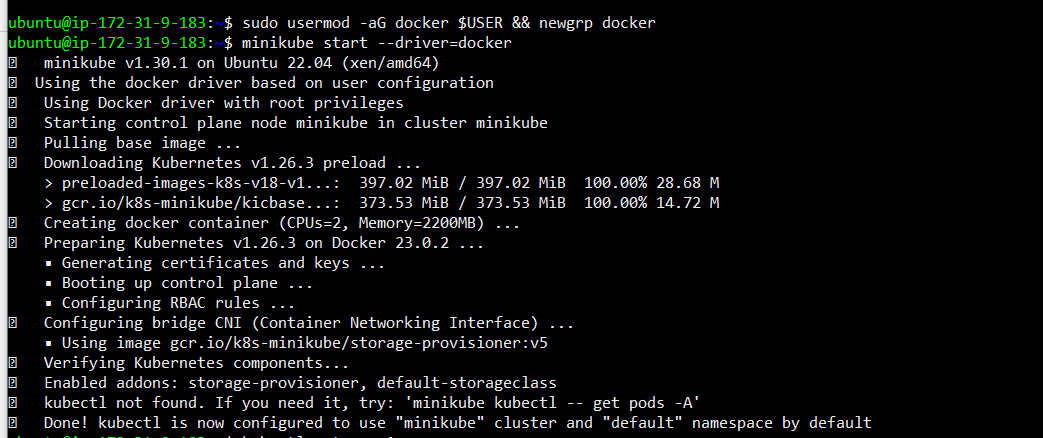
Setup Minikube


created namespace testing
pod.yml file

apiVersion: v1
kind: Pod
metadata:
    name: nginx
    namespace: testing
spec:
       containers:
       - name: nginx
         image: nginx:1.14.2
         ports:
               - containerPort: 80

deployment.yml file
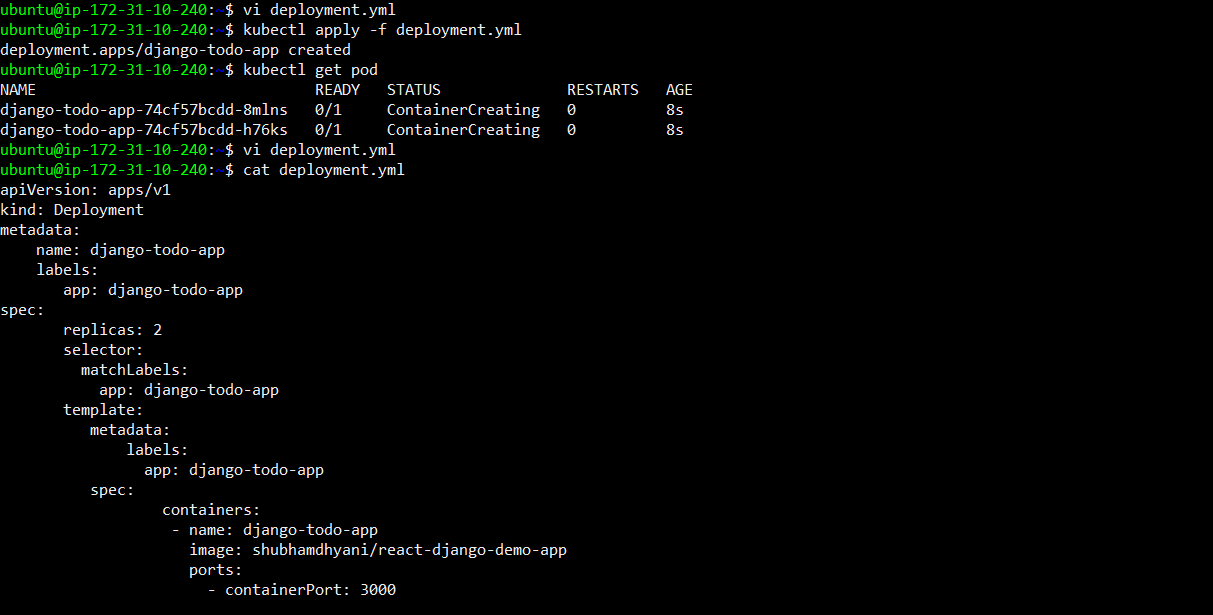
apiVersion: apps/v1
kind: Deployment
metadata:
    name: django-todo-app
    namespace: testing
    labels:
       app: django-todo-app
spec:
       replicas: 2
       selector:
         matchLabels:
           app: django-todo-app
       template:
          metadata:
              labels:
                app: django-todo-app
          spec:
                  containers:
                   - name: django-todo-app
                     image: shubhamdhyani/react-django-demo-app
                     ports:
                       - containerPort: 3000

Added namespace to deployment file

THAT'S ALL FOR TODAY'S LEARNING I HOPE YOU LEARN SOMETHING FROM THIS BLOG


